Sunday, February 5, 2017
3D Ball Tutorial For Photoshop
3D Ball Tutorial For Photoshop

| This tutorial teaches you how to create a 3D ball in a few simple steps using Photoshop CS. Step 1 Open your canvas. Press D. (to set default foreground and background colors) Press Alt+Backspace to fill the canvas with black color. Create a new layer by clicking on the |
|

Step 2
Select the Elliptical marquee tool![]() from the toolbar, with the shift key down draw a circle on the canvas. The circle is marked with a dashed line.
from the toolbar, with the shift key down draw a circle on the canvas. The circle is marked with a dashed line.
Step 3
Click on the black foreground color ![]() on the toolbar and select your favorite color, I selected blue. Now press Alt+Backspace, the circle is shaded with the color now.
on the toolbar and select your favorite color, I selected blue. Now press Alt+Backspace, the circle is shaded with the color now.
Step 4
Create another new layer the same way how you did in the first step.
Step 5 Now well use the airbrush to give some shading. Click on the brush tool
Press D to make the foreground color to black. With the brush paint gently around the ball, keep the position of the brush as seen in the image on the right. |
|


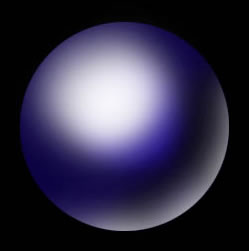
Step 6
Create a new layer. Press x to set the foreground color to white. With the same sized brush paint the edge as seen in the image below and also shade the top of the ball.

 Tags :- Photoshop 8 , Photoshop 7 trick , trick for Photoshop CS6 , photoshop PNG , Png Images , image png , png , transparent images , transparent png , psd , psd image , png free , download png , png for free , png blogspot , png photoshop , photoshop png images , images for photoshop , cs5 trick , photoshop tricks , photoshop tricks , photoshop background , photoshop psd , photoshop cs5, photoshop cs5 trick,
 Available link for download